How to Keep Garden Tools From Rusting
Copy Link
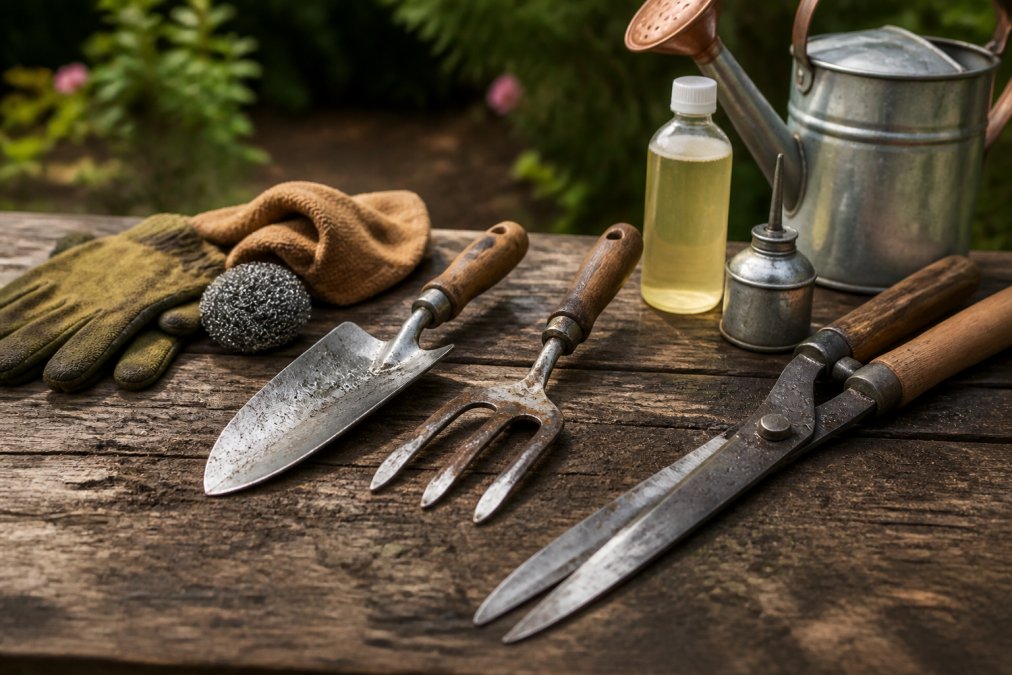
Table of Contents
- Why Garden Tools Rust and What You’re Fighting
- How to Clean Rusty Garden Tools Before Storage
- Best Oil for Garden Tool Maintenance and Protection
- How to Apply Protective Coatings to Keep Garden Tools From Rusting
- Garden Tool Storage Ideas for Sheds and Enclosed Spaces
- Maintenance Routine to Stop Rust Before It Starts
- Common Mistakes That Speed Up Rust
- Conclusion
Last Updated: August 17, 2026
Why Garden Tools Rust and What You’re Fighting
Rust forms when iron in metal tools reacts with oxygen and moisture in the air. This electrochemical process accelerates in humid environments, especially in sheds or storage spaces where air circulation is poor. Understanding what causes rust is the first step to preventing it.
Garden tools face a particular challenge because they’re exposed to soil, fertilizers, and water throughout the growing season. Even after you clean them, residual moisture trapped in crevices or on blade edges can trigger rust formation within days. The Pennsylvania climate, with its humid summers and damp springs, creates ideal conditions for rapid corrosion if tools aren’t properly protected.
The good news: rust prevention isn’t complicated, and it doesn’t require expensive equipment. What matters most is consistency. A simple routine of cleaning, drying, and applying a protective coating will add years to your tools’ lifespan. Tools that might otherwise deteriorate in two seasons can remain functional for decades with minimal effort.
How to Clean Rusty Garden Tools Before Storage
Before you apply any protective coating, you need to remove existing rust and debris. This step determines how well your preventative measures will work. Rust underneath a fresh coat of oil will continue spreading, so don’t skip the cleaning phase.
Remove Surface Rust With Steel Wool or a Wire Brush
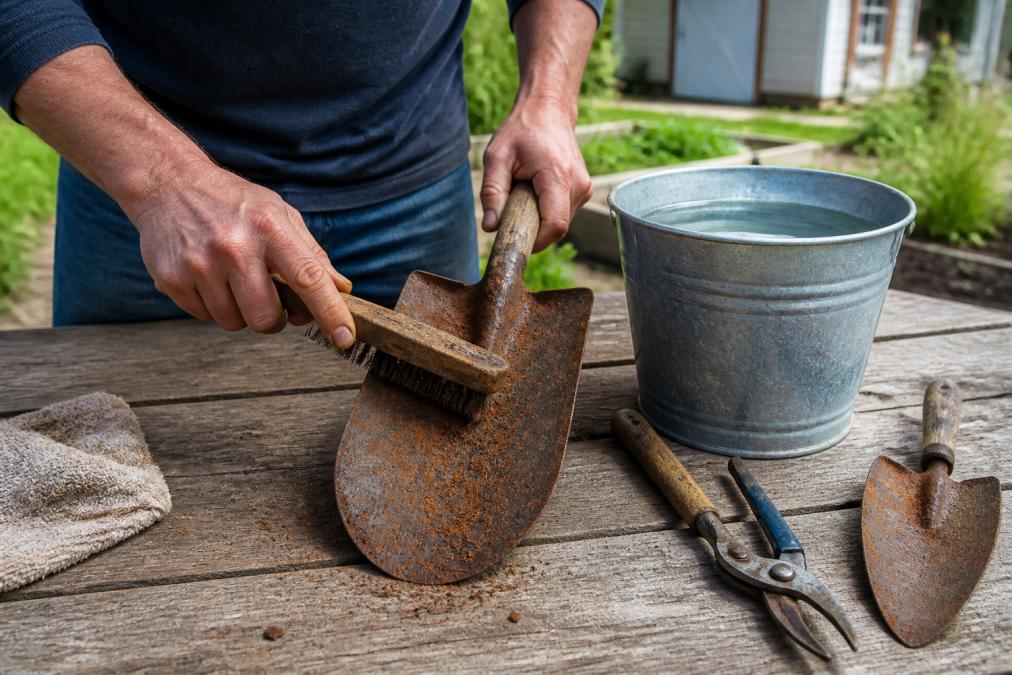
Start by scrubbing away loose rust and corrosion with a wire brush or medium-grade steel wool. Work in circular motions across the affected areas, applying moderate pressure. For tools with extensive rust, a wire wheel attachment on a power drill will speed up the process, though hand tools work fine for light to moderate corrosion.
Focus on blade edges, joints, and any areas where rust has begun to pit the metal surface. These pitted areas trap moisture and will rust again quickly if left untreated. Spend time here, thorough cleaning now prevents repeat rust formation.
After brushing, wipe the tool with a dry cloth to remove rust particles and dust. Any remaining debris will interfere with the protective coating you apply next.
Wash and Dry Thoroughly
Rinse the tool with clean water to remove any remaining rust particles and steel wool fibers. Use a brush or cloth to scrub away stubborn debris, then dry immediately with a clean towel. Don’t let tools air-dry; moisture left on the surface will begin oxidizing again within hours.
Pay special attention to crevices, handles, and areas where the blade meets the handle. Water trapped in these spots is a common cause of rust returning quickly after cleaning. If your tools have wooden handles, dry those carefully too, excess moisture can cause wood to swell or rot.
For tools with intricate designs or multiple moving parts, consider using compressed air to force water out of hard-to-reach areas. A hair dryer on a cool setting also works well for this purpose.
Best Oil for Garden Tool Maintenance and Protection
The right protective coating makes the difference between tools that last and tools that corrode again within weeks. Different oils and products offer varying levels of protection depending on your storage conditions and how long you plan to keep tools unused.
Synthetic Corrosion Inhibitors for Heavy-Duty Protection
For long-term storage or tools kept in high-humidity environments, synthetic corrosion inhibitors offer superior protection. Products like WD-40 Specialist Long-Term Corrosion Inhibitor protect metal for up to two years indoors or one year outdoors. These formulas create a barrier that actively repels moisture and salt spray.
CRC Heavy Duty Corrosion Inhibitor works similarly, with particular effectiveness in high-humidity conditions. It’s designed for tools exposed to salt spray or stored in damp sheds. The dark amber color also helps you see where you’ve applied protection.
Star Brite Ultimate Corrosion Blocker uses PTEF polymers that bond to metal surfaces, creating an invisible, non-sticky protective layer. This product is especially useful if you want tools that stay clean and ready to use without a greasy feel.
These synthetic options are ideal if you’re storing tools for the entire off-season or keeping specialty equipment that sees infrequent use. They’re more expensive than natural oils but provide longer-lasting protection with minimal reapplication needed.
Natural Oils for Fine Tools and Blades
For hand tools, pruning shears, and fine-quality blades, natural oils like Ballistol Multi-Purpose Oil or Camellia Oil offer gentler protection. Ballistol cleans, lubricates, and protects without gumming up or attracting debris. It’s biodegradable and safe to handle, making it a good choice if you prefer non-synthetic options.
Camellia Oil is the traditional choice for preserving high-quality carbon steel tools and wooden handles. It’s odorless, non-toxic, and leaves a clean finish that doesn’t attract dust. Japanese woodworking tools and fine gardening implements have been protected with camellia oil for centuries. A thin coat is all you need, excess oil just creates mess.
Fluid Film is another lanolin-based option that embeds in metal pores and won’t evaporate or freeze. It’s particularly effective in humid climates and doesn’t harm paint or rubber.
Natural oils require more frequent reapplication, especially if tools are stored for months. They’re best for tools you use regularly or rotate through your collection. If a tool sits untouched for six months, a synthetic inhibitor is the safer choice.
How to Apply Protective Coatings to Keep Garden Tools From Rusting
Application method matters as much as product choice. A thin, even coat protects better than a thick, uneven one. Excess product attracts dust and debris, defeating the purpose.
Spray-On Rust Preventatives
Spray-on products offer the easiest application. Hold the can 6-8 inches from the tool surface and apply a light, even coat. Let the first coat dry for a few minutes, then apply a second thin coat if needed. Two light coats are better than one heavy application.
Spray in a well-ventilated area, outdoors is ideal. Avoid breathing the mist, and keep the product away from your skin. Most spray products dry quickly, so you can handle treated tools within 15-30 minutes.
For tools with wooden handles, be careful not to oversaturate. A light spray on the metal portions is sufficient. Excess product on wood can darken the finish or create a sticky feel.
Paint-Based Protection for Long-Term Storage
Rust-Oleum Stops Rust Protective Enamel offers paint-based protection that lasts longer than oils. It’s available in various colors and finishes, including clear, which preserves the tool’s appearance.
Paint-based options are ideal if you’re storing tools for an entire season or longer. The coating is more durable than oils and won’t need reapplication as frequently. However, painted tools feel less natural to use, so reserve this approach for tools you won’t touch for months.
Apply paint with a brush or spray, following the product instructions. Most formulas require two coats for full protection. Allow adequate drying time between coats, typically 4-8 hours depending on the product and temperature.
Garden Tool Storage Ideas for Sheds and Enclosed Spaces
Where and how you store tools matters as much as what you apply to them. Even well-protected tools will rust if stored in conditions that promote moisture accumulation.
Control Humidity Inside Your Storage Space
Humidity is rust’s best friend. A shed or garage where moisture collects will defeat even the best protective coatings. Aim to keep relative humidity below 50 percent in your storage space.
Install a simple hygrometer to monitor moisture levels. Many hardware stores sell affordable digital versions. If humidity regularly exceeds 50 percent, consider adding ventilation, even a small vent or window that allows air circulation makes a significant difference.
Silica gel packets absorb moisture from the air and are an inexpensive way to reduce humidity in toolboxes or enclosed storage areas. Place packets on shelves near your tools or inside closed storage containers. Replace or recharge them when saturated (many change color to indicate they’re full).
For serious humidity problems in a West Chester-area shed, a small dehumidifier might be worth the investment. These devices actively remove moisture from the air and are particularly useful in basements or older structures where dampness is chronic.
Organize Tools to Prevent Moisture Trapping
How you arrange tools affects rust prevention. Tools stacked or stored touching each other trap moisture between surfaces. Space them apart so air can circulate freely around each tool.
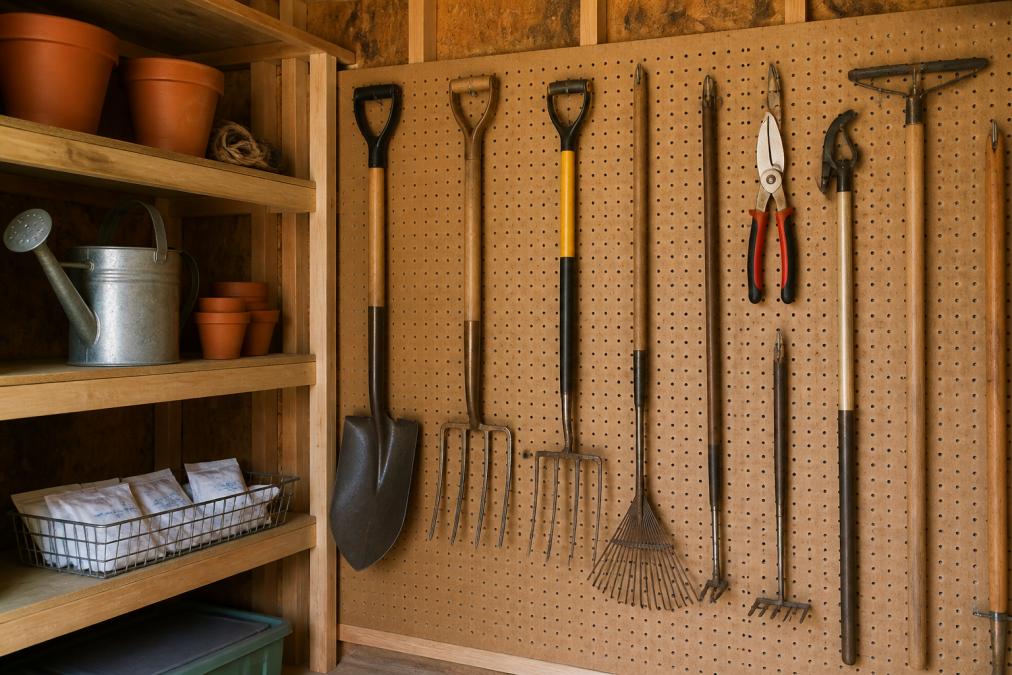
Hang tools on pegboard or wall hooks rather than storing them in drawers or closed cabinets. Hanging allows air to reach all surfaces and prevents water from pooling around tool bases.
If you use a toolbox for storage, drill small ventilation holes in the bottom to allow air circulation. Leave the lid slightly ajar if possible, or install a simple latch that doesn’t seal completely.
Avoid storing tools directly on concrete floors, especially in damp basements or sheds. Concrete wicks moisture from the ground and creates a perpetually damp environment. Use a wooden shelf or wall-mounted storage instead.
Keep tools away from windows and exterior walls where temperature fluctuations cause condensation. Interior walls in climate-controlled spaces are ideal, though most homeowners don’t have that luxury in a typical shed.
Maintenance Routine to Stop Rust Before It Starts
Prevention is easier than cure. A simple maintenance routine requires only minutes per session but will extend your tools’ lifespan significantly.
After-Use Cleaning and Light Oiling
After each use, wipe tools clean with a dry cloth to remove soil and moisture. This single step prevents most rust problems. Soil contains salts and acids that accelerate corrosion, and moisture left on metal surfaces begins oxidizing immediately.
Once a month during the growing season, apply a light coat of protective oil to tools you use regularly. A few minutes with a cloth and a bottle of Ballistol or camellia oil keeps tools protected without requiring extensive effort.
Pay attention to tool joints and blade edges where moisture collects. These areas need more frequent attention than smooth surfaces.
Seasonal Deep Maintenance
Before storing tools for winter, perform a thorough cleaning and protective coating. Use the wire brush method described earlier to remove any surface rust, then apply a fresh coat of protective oil or synthetic inhibitor.
In spring before the growing season begins, wipe tools with a dry cloth to remove any dust or debris that accumulated during storage. A light reapplication of oil is optional if you’re using tools frequently, the protective layer from your winter coating will still be present.
If you notice any new rust spots during the season, address them immediately with a wire brush and fresh oil. Catching rust early prevents it from spreading.
Common Mistakes That Speed Up Rust
Understanding what not to do is as important as knowing what to do. These mistakes are common but easily avoided.
Storing tools while still wet is the fastest way to guarantee rust. Even a thin film of moisture left on metal will begin oxidizing within hours. Always dry tools completely before storage.
Applying excessive protective coating creates a sticky surface that attracts dust and debris. These particles trap moisture underneath the coating and actually accelerate rust. A thin, even coat is always better than a heavy application.
Storing tools in closed containers without ventilation creates a humid microenvironment. Moisture condenses inside the container and has nowhere to escape. Open storage or containers with ventilation holes are much better.
Neglecting tools between uses allows rust to begin forming. A tool left outdoors for a week will develop surface rust that takes longer to clean than if you’d maintained it weekly. Consistency matters more than heroic deep-cleaning efforts.
Mixing different protective products can create reactions that reduce their effectiveness. Stick with one product type, either oils or synthetic inhibitors, and reapply as needed rather than layering different products.
Protecting your garden tools from rust doesn’t require expensive equipment or complicated techniques. The real challenge is consistency, cleaning after use, applying protective coatings, and storing tools in conditions that prevent moisture accumulation. Tools that receive this basic care will serve you reliably for decades.
If you’re building a storage solution for your tools and other outdoor equipment, Riehl Structures offers custom-designed sheds and storage buildings built with Amish craftsmanship. A dedicated storage space with proper ventilation and organization keeps tools protected while maximizing your available yard space. With flexible financing and free delivery within 30 miles of our West Chester and King of Prussia locations, we make it easy to create the storage solution your property needs. Get a quote now to explore custom options for your specific space and requirements.
Frequently Asked Questions
What is the best way to remove rust from garden tools?
Start by scrubbing the rusted area with a wire brush or steel wool to remove loose rust and corrosion. For heavier rust, soak the tool in white vinegar for 24 hours, then scrub again. Rinse thoroughly with clean water and dry completely with a cloth. Once clean and dry, apply a protective oil or corrosion inhibitor to prevent future rust. This method works for most hand tools and keeps them functional for years.
Should I oil my garden tools after every use?
Light oiling after each use is ideal for high-value or frequently used tools, especially if you work in humid conditions. A quick wipe with an oiled cloth takes seconds and dramatically extends tool life. For occasional-use tools stored in a dry shed, monthly or seasonal oiling is sufficient. The key is consistency: tools that sit untouched for months are far more likely to rust than those maintained regularly, even with minimal effort.
Is WD-40 good for protecting garden tools from rust?
WD-40 Specialist Long-Term Corrosion Inhibitor is effective for rust prevention, offering protection for up to one year outdoors or two years indoors. It displaces moisture and creates a protective layer. However, it works best as part of a complete strategy: clean and dry your tools first, apply the inhibitor, and store them in a low-humidity environment. For tools stored long-term, dedicated corrosion inhibitors or lanolin-based oils like Fluid Film may provide more durable protection than standard WD-40.
How does humidity in Pennsylvania affect garden tool maintenance?
Pennsylvania's humid climate, especially in the Greater Philadelphia and Chester County areas, accelerates rust formation on bare metal. High moisture in the air means tools rust faster if left unprotected, even indoors. This makes proper storage and protective coatings essential. Storing tools in a shed with moisture control (silica gel packets or a dehumidifier) and applying corrosion inhibitors before storage are critical steps. Regular maintenance is more important in humid regions than in drier climates.
This article was written using GrandRanker

Copy Link