How to Organize Shed Shelves for Maximum Space
Copy Link
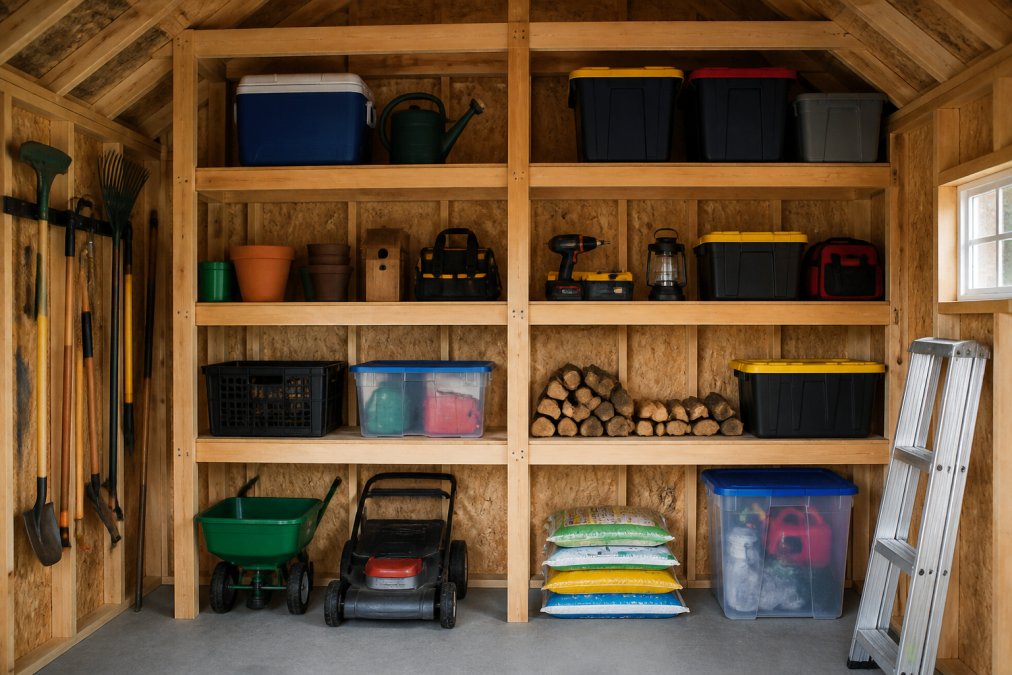
Table of Contents
- How to Organize Shed Shelves: Planning Your Layout
- Best Shed Shelving Units for Your Needs
- Vertical Storage Solutions for Sheds
- Shed Organization Best Practices
- Step-by-Step Installation Process
- Maximizing Floor Space and Accessibility
- Maintaining Long-Term Shed Organization
- Conclusion
Last Updated: August 10, 2026
How to Organize Shed Shelves: Planning Your Layout
Organizing shed shelves for maximum space means creating a system that lets you find what you need, use vertical storage efficiently, and keep tools accessible. At Riehl Structures, we work with homeowners across West Chester and Chester County who invest in quality sheds, then struggle to organize them effectively. The difference between a chaotic shed and one that works comes down to planning.
Before you install a single shelf, understand what you’re working with: space is finite, weight capacity matters, and your organization system determines whether you’ll be frustrated or satisfied every time you walk in.
Assess Your Current Space and Weight Capacity
Measure your shed’s interior dimensions and identify walls suitable for shelving. Note height from floor to ceiling, wall width, and obstructions like windows, doors, or outlets.
Weight capacity is critical. Heavy-duty metal shelving holds 500-1,000 pounds per shelf depending on design and anchoring. Wood shelving typically supports 200-400 pounds per shelf. Calculate the total weight of what you plan to store, power tools, generators, and bags of concrete or fertilizer require sturdy shelves. Be honest about current and future storage needs.
Map Out Your Storage Zones
Divide your shed into zones: tool, gardening, seasonal storage, and maintenance supplies. This prevents searching multiple areas for simple items.
Frequently used items go at eye level or within arm’s reach. Occasional-use items can go higher or lower. Seasonal items occupy less accessible spots. Heavy items always go on lower shelves to keep the center of gravity low and reduce lifting strain.
Sketch your shed’s layout on paper, mark where zones go, and indicate which walls will hold shelving. This prevents expensive mistakes and ensures your system serves how you actually work.
Best Shed Shelving Units for Your Needs
Choosing the right shelving system is foundational to effective organization.
Heavy-Duty Metal Shelving vs. Wood Options
Heavy-duty metal shelving dominates shed organization for good reason. Steel or aluminum units resist rust when properly treated, handle serious weight loads, and adjust easily when needs change. Metal costs more upfront but outlasts wood by years, especially in humid climates like Pennsylvania where moisture accelerates decay.
Wood shelving costs less initially and works for light to moderate loads, but absorbs moisture, warps over time, and eventually rots without constant sealing and maintenance. For West Chester area sheds, metal shelving makes more sense long-term.
Adjustable vs. Fixed Shelving Systems
Adjustable shelving lets you change shelf heights as needs evolve. You can start with shelves 12 inches apart, then adjust to 18 inches when you buy taller storage bins. Fixed shelving locks you into one configuration permanently.
Adjustable systems cost more and require careful installation with multiple anchor points per shelf position. Fixed systems are faster to install and slightly cheaper but inflexible. For most homeowners, adjustable shelving wins because storage needs change over time.
Vertical Storage Solutions for Sheds
The biggest mistake in shed organization is thinking horizontally. Most sheds are taller than they are wide. Using vertical space transforms a cramped shed into one that feels spacious.
Wall-Mounted Shelving and Pegboards
Wall-mounted shelves run perpendicular to the wall, creating storage without taking up floor space. Floating shelves look clean but have weight limits of 50-100 pounds per shelf. Shelves with visible support brackets hold much more, sometimes 200+ pounds per shelf.
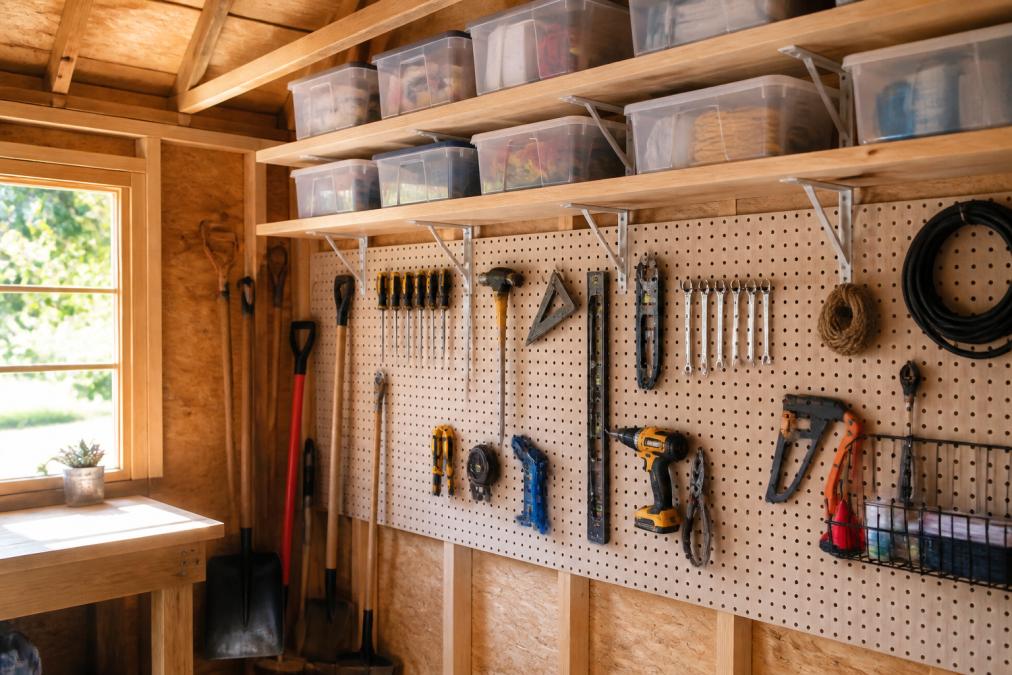
Pegboard is the workhorse of tool storage. Pegboard panels mount flat against the wall with hooks at any height or spacing you choose. It’s modular, affordable, and perfect for hand tools, small power tools, and supplies. A single 4-by-8-foot pegboard panel costs less than most shelving units and organizes dozens of items. The catch: pegboard sags under heavy weight, so use it for tools and light items, not concrete bags or heavy machinery.
Paint pegboard or shelving a light color. White, cream, or pale gray reflects light and makes the shed feel larger.
Overhead and Ceiling Storage Strategies
Ceiling space is often wasted. Install overhead storage racks or beams to hold seasonal items, boxes, or lightweight equipment you rarely access. Overhead storage keeps the floor clear and makes the shed feel less cluttered.
Never store heavy items overhead. Ensure your shed’s roof structure can handle the weight. Most sheds are built with roof trusses designed for snow load and wind, not additional storage. If unsure, consult the shed’s specifications or have a local contractor assess it. If you own one of our structures, we can advise on safe overhead storage capacity.
Shed Organization Best Practices
Organization systems only work if you maintain them.
Categorizing and Grouping Tools by Use
Group similar items together: all painting supplies in one zone, gardening tools in another, fasteners and hardware in labeled containers in a third. Use the "like with like" principle, hammers together, screwdrivers with fastening tools, pruning shears with garden tools. This creates a mental map you internalize quickly.
Label everything using a label maker or waterproof markers on clear bins and shelves. Labels take five minutes to create and save hours of searching over a year.
Using Clear Bins and Labeling Systems
Clear plastic storage containers are the foundation of shed organization. You see contents without opening them, they stack efficiently, and protect items from dust and moisture.
Choose bins in consistent sizes so they stack neatly. Small bins hold fasteners and small parts. Medium bins hold supplies like paint and brushes. Large bins hold seasonal items or bulky supplies.
Label the front and top of each bin. Store bins on shelves with labels facing out, organizing by frequency of use. Weekly-access bins go at eye level. Monthly items go higher or lower. Rarely used bins go on hardest-to-reach shelves.
Step-by-Step Installation Process
Proper installation determines whether your shelving lasts 5 years or 15 years.
Locating Studs and Planning Anchor Points
Studs are vertical wooden framing members typically 16 inches apart (sometimes 24 inches). Shelving mounted into studs holds far more weight than shelving mounted into drywall alone.
Use a stud finder to locate studs and mark them with a pencil. Plan shelf locations so brackets attach directly to studs. If studs don’t align with desired shelf locations, use heavy-duty anchors rated for your storage weight. Toggle bolts and molly bolts work in drywall but are weaker than stud mounting.
Mark shelf heights on the wall using a level to ensure shelves are actually level, not just "close enough."
Installing Wall-Mounted and Floating Shelves
Floating shelves use hidden brackets mounted inside the shelf. Mark bracket locations, drill pilot holes, and install fasteners. Then slide the shelf onto the brackets for a clean look.
Use fasteners appropriate to your wall type. In studs, use 3-inch wood screws or bolts. In drywall without studs, use toggle bolts rated for your shelf’s weight. Never guess at fastener capacity.
For wall-mounted shelves with visible brackets, mount brackets to studs using bolts or lag screws, rest the shelf on the brackets, and secure it. Visible brackets support more weight because the load path is direct.
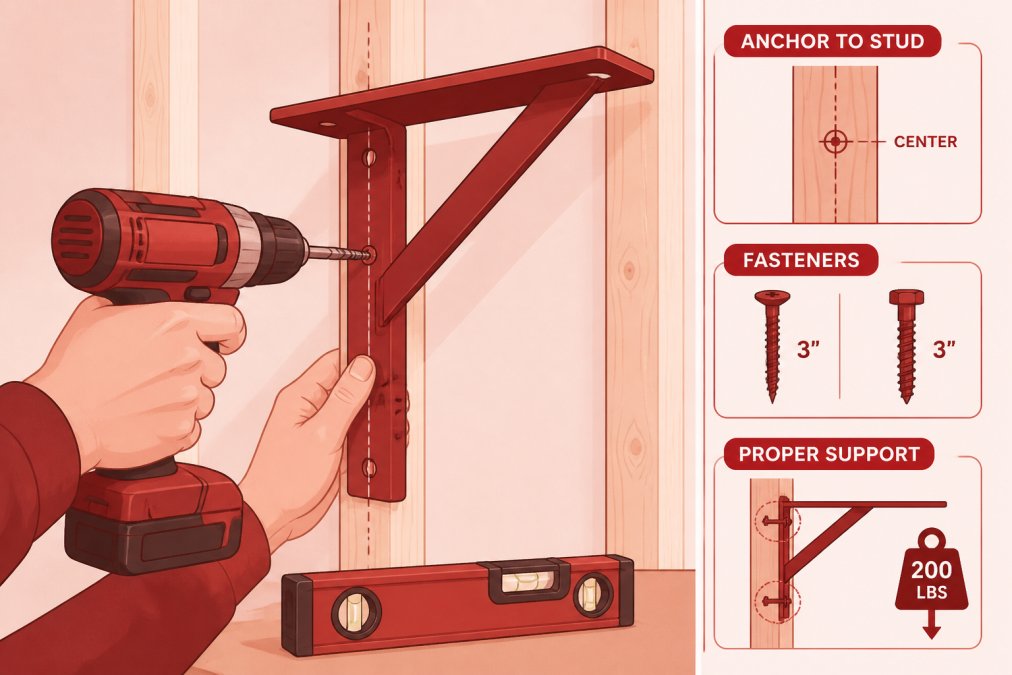
Install shelves level using a 2-foot or 4-foot level, checking both directions.
Securing Heavy-Duty Units and Testing Load Capacity
Heavy-duty metal shelving units need to be secured to the wall or floor, especially if tall and narrow. Bolt the unit to wall studs using 3/8-inch bolts through the frame, or bolt it to the floor using concrete anchors.
Before loading a shelf to capacity, test it with weight. Load one shelf with half the rated weight and look for deflection or movement. Never exceed the rated capacity.
Maximizing Floor Space and Accessibility
Floor space is premium real estate in a shed.
Strategic Placement to Keep Pathways Clear
Create a main pathway through the shed from door to back, keeping it at least 2 feet wide. Place tall shelving units along walls, not in the middle of the floor. Use floor space for frequently accessed items or items that don’t fit on shelves: a workbench, power tool charging station, or lawn mower.
Measure before buying shelving to know exactly where it will go and how much floor space remains.
Ergonomic Organization for Easy Access
Store items at heights that minimize reaching and bending. Your most-used items should be at elbow height when your arms are relaxed. Heavy items go on lower shelves, light items go high. This reduces strain and prevents accidents.
Create a workbench or staging area where you can lay out tools before starting a project, preventing multiple trips back and forth to shelves.
Maintaining Long-Term Shed Organization
Organization decays without maintenance. Spend 15 minutes every few weeks returning items to their zones. Don’t let tools pile up on the workbench.
Review your system twice a year, spring and fall are good times. Ask yourself: Do I still use these items? Are some zones overcrowded? Should I adjust shelf heights or move zones? Small adjustments prevent the system from becoming obsolete.
Donate or discard items you don’t use. If you haven’t used something in a year, you probably won’t. Removing dead weight makes room for things that matter.
Clean shelves annually. Dust accumulates and moisture can promote rust on metal shelves. A quick wipe-down takes 30 minutes and extends your shelving system’s life significantly.
Organizing shed shelves for maximum space is a project that pays dividends every time you use your shed. A well-organized system saves time, prevents frustration, and makes your shed actually functional.
The investment in quality shelving is worth it. Your shed is an extension of your home and deserves thoughtful organization. If you’re considering a new shed to house your tools and equipment, Riehl Structures offers custom-designed sheds built with organization in mind. Our Amish-built structures are engineered for durability and can be configured with built-in shelving and storage solutions tailored to your specific needs. With free delivery within 30 miles of our West Chester location and flexible financing options, we make it easy to get a shed that works for you. Get a quote now and discover how a properly designed shed transforms your storage challenges.
Frequently Asked Questions
How do you maximize storage on shed shelves?
Maximize storage by using vertical space with wall-mounted shelves and pegboards, installing adjustable shelving units to accommodate different item heights, and utilizing overhead storage for seasonal items. Use clear bins to stack items efficiently, keep frequently used tools at eye level, and organize by category. Heavy-duty metal shelving units can hold more weight than wood, allowing you to store denser items. Label everything and maintain clear floor space for accessibility.
What are the best storage containers for outdoor sheds?
Clear plastic bins work best for sheds because they're rust-resistant, weatherproof, and let you see contents without opening them. Choose containers with tight-fitting lids to protect items from moisture and pests. For heavy tools and hardware, use metal storage boxes with latches. Avoid cardboard boxes, which deteriorate in humid conditions. Stack containers on shelves rather than the floor to maximize space and prevent water damage. Label each bin clearly for quick identification.
How do you keep shed shelves organized long-term?
Establish a labeling system and inventory list so you know exactly what's stored where. Conduct a quarterly review to remove items you no longer use and prevent clutter buildup. Return tools to their designated spots immediately after use. Use adjustable shelving so you can reconfigure as your storage needs change. Keep frequently accessed items at waist height for ergonomics. Protect metal shelving from rust with rust-resistant coatings, and check fasteners regularly to ensure shelves remain secure.
What should you never store in a backyard shed?
Never store propane, gasoline, paint thinner, or other flammable liquids in an unventilated shed due to fire and explosion risk. Avoid storing food that attracts pests, or pesticides and fertilizers that can off-gas. Don't keep items sensitive to temperature swings, such as electronics or batteries, without climate control. Avoid storing anything that requires climate-specific protection unless your shed is insulated and climate-controlled. Keep medications, cleaning chemicals, and anything toxic away from children and pets.
This article was written using GrandRanker

Copy Link