How to Level Yard for Gazebo: Step-by-Step
Copy Link
Table of Contents
- Why Leveling Your Yard Matters for Gazebo Installation
- Tools and Materials You’ll Need to Level Ground
- How to Assess Your Yard’s Current Grade
- Step-by-Step Process for Leveling Your Yard
- Gazebo Foundation Types and Leveling Requirements
- How to Grade a Yard for Drainage Around Your Gazebo
- Common Mistakes to Avoid When Leveling
- When to Call a Professional for Yard Grading
Last Updated: August 22, 2026
Why Leveling Your Yard Matters for Gazebo Installation
A level yard is the foundation of a stable, long-lasting gazebo. Without proper grading, your structure sits on uneven ground, which creates stress on the frame, causes doors and windows to bind, and accelerates wear on fasteners and joints. Over time, an improperly installed gazebo can shift, crack, or become unsafe.
At Riehl Structures, we’ve helped homeowners across West Chester and the surrounding region understand that site preparation is just as important as the structure itself. When you level your yard for gazebo installation, you’re investing in years of reliable performance and protecting your investment from the ground up.
The stakes are real. A gazebo built on sloped or compacted soil may settle unevenly, creating gaps between the foundation and the structure. Water can pool in low spots, leading to rot, rust, and foundation failure. Proper leveling ensures your gazebo sits securely, drains well, and remains square and plumb for decades.
Most homeowners underestimate how much slope matters. Even a 2-3% grade that looks level to the eye can cause structural problems over time ([peer-reviewed research](https://pmc.ncbi.nlm.nih.gov/articles/PMC12134279/)). Use a proper surveying method, not your eyesight, to verify true levelness before installation.
Tools and Materials You’ll Need to Level Ground
Before you begin, gather the right tools. Proper equipment makes the job faster, safer, and more accurate. Here’s what you’ll need to level yard for gazebo installation:
Essential Tools:
- A 4-6 foot level (a laser level is ideal for larger areas)
- Measuring tape (at least 50 feet)
- Shovel and spade
- Wheelbarrow
- Rake
- Tamper or plate compactor
- String line and stakes
- Marking paint or chalk
- Work gloves and safety glasses
Materials:
- Topsoil or fill dirt (amount depends on your yard‘s current grade)
- Landscape fabric (optional, for drainage improvement)
- Gravel or sand for base preparation
If your yard has significant slopes or soft spots, you may also want to rent a small walk-behind compactor or hire equipment. Many hardware stores in the West Chester area rent compactors by the day for reasonable rates. This investment pays for itself in time saved and better results.
A laser level is worth renting if you’re working on an area larger than 200 square feet. It takes the guesswork out of leveling and saves hours compared to a standard bubble level.
How to Assess Your Yard’s Current Grade
Before you start digging, understand what you’re working with. Proper assessment determines how much work lies ahead and prevents costly mistakes.
Start by identifying the highest and lowest points in your gazebo’s intended footprint. Use your 4-6 foot level and measuring tape to find the elevation difference. Place the level on the ground and note where it tilts. Measure the vertical distance at each end. This tells you your slope percentage.
For example, if your level is 4 feet long and one end is 3 inches higher than the other, you have a slope of about 6% (3 inches ÷ 48 inches = 0.0625 or 6.25%). Most gazebos need to be level to within 1%, meaning no more than about 0.5 inches of variation across a typical 8×8 or 10×10 foundation.
Walk the entire area where your gazebo will sit. Look for soft spots, standing water, or areas where the ground compresses under your weight. These indicate poor drainage or unstable soil. Mark these areas with paint or flags, they’ll need extra attention during grading.
Check for underground utilities. Call 811 before you dig to have utility lines marked (call811.com). This prevents accidents and expensive repairs. The service is free and takes about 48 hours in most areas.
Assess your soil type. Squeeze a handful of moist soil. If it forms a tight ball, you have clay. If it falls apart, you have sandy soil. Clay drains poorly and compacts well; sandy soil drains quickly but doesn’t compact as firmly. This affects your grading strategy.
Step-by-Step Process for Leveling Your Yard
Mark and Measure the Area
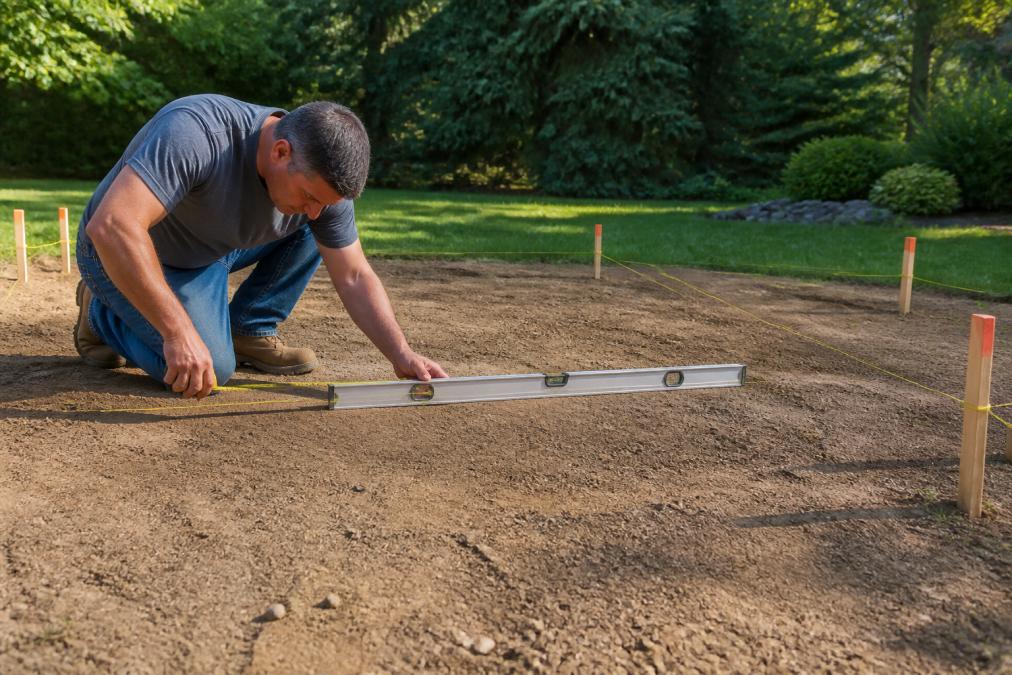
Start by marking the exact footprint of your gazebo. Use stakes and string to outline the perimeter. This gives you a clear boundary and prevents accidental digging beyond the necessary area.
Establish a reference point, typically the highest corner or center of the area. Use this as your baseline for all elevation measurements. Mark it with a stake and note the elevation. Measure from this point to establish the target elevation for the entire area. Your goal is to bring all points to the same height.
Remove Vegetation and Debris
Clear all grass, weeds, roots, and debris from the marked area. Use a shovel to strip the sod if you have it. Remove rocks larger than 2 inches. This prevents soft spots and ensures even compaction later.
Dig out any roots that extend into the work area. Roots decay over time, creating voids that cause settling. Don’t leave them behind. Haul away the removed material or compost it if you have space.
Grade the Soil
Now begins the actual leveling work. Start from the high point and work toward the low spots. Remove soil from high areas and transfer it to low areas using a shovel and wheelbarrow. Spread the soil evenly across low spots, working in layers of 2-3 inches.
As you add soil, rake it smooth and compact it lightly with your feet or a hand tamper. This prevents air pockets. Check your progress frequently with the level. Make small adjustments, it’s easier to add a little soil than to remove it later.
For large areas or significant slopes, consider renting a small grader or hiring a contractor with grading equipment. This speeds the process and produces more consistent results than hand work.
Compact and Verify Levelness
Once the area is roughly level, compact the soil thoroughly. Use a tamper or rent a plate compactor. Make multiple passes, overlapping each pass by about 6 inches. Compact in a systematic pattern, not randomly, to ensure even compression.
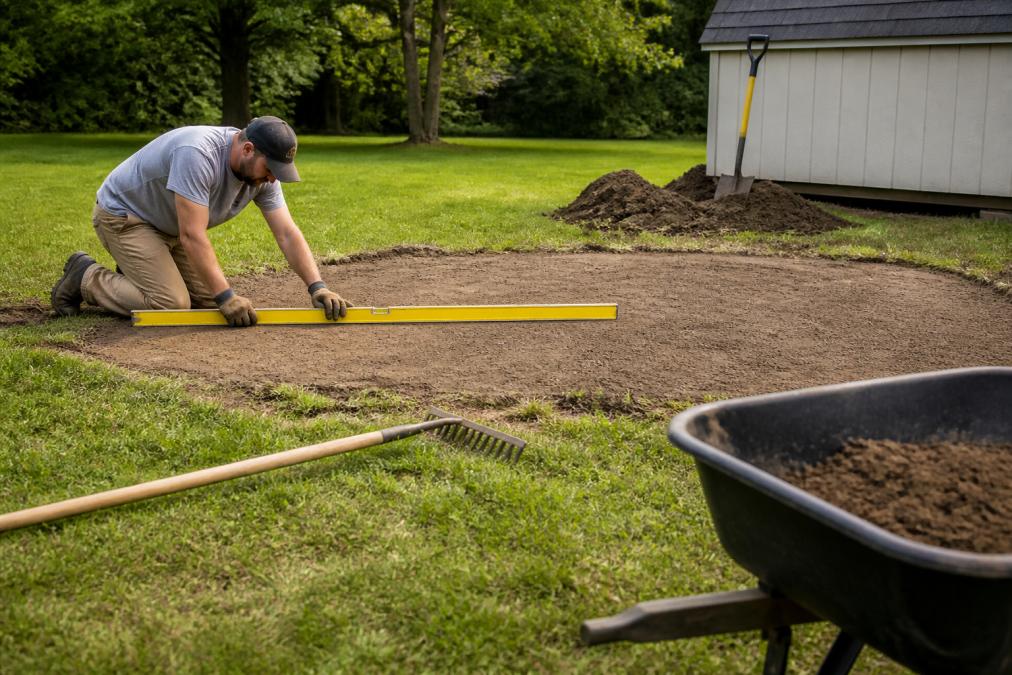
After compacting, check levelness again with your level. Make a final pass with the rake to remove any high spots or depressions. The surface should feel firm underfoot and show no soft areas. If you step on the soil and it compresses, compact it more.
For a final check, use a laser level if you have access to one. Mark several points across the area and verify they’re all at the same elevation. If you find low spots after compaction, add a thin layer of soil, compact again, and recheck.
Gazebo Foundation Types and Leveling Requirements
Different foundation types have different leveling requirements. Understanding your options helps you prepare the site correctly.
Concrete Pad Foundation, The most stable option. Requires a level base to within 1 inch across the entire area. Concrete is poured over a gravel base, so the grading work ensures the concrete sets evenly. This is the gold standard for permanent gazebos.
Gravel Base, A simpler, less expensive option. Requires the base to be level to within 2 inches. Gravel compacts and shifts over time, so it works for temporary or semi-permanent structures. Riehl Structures can discuss foundation options with customers.
Deck Blocks or Piers, Individual footings placed at corners and midpoints. Requires the base to be level to within 1 inch at each pier location. This method is faster than pouring concrete but requires precise placement.
Treated Wood Skids, Wooden beams laid directly on the ground. Requires a level base to within 1 inch. Wood eventually rots, so this is the least durable option. Not recommended for permanent installations.
Never skip the leveling step, even for temporary gazebos. An unlevel foundation causes the structure to rack (twist), which stresses joints and fasteners. Within one season, you’ll see gaps, loose bolts, and sagging panels.
How to Grade a Yard for Drainage Around Your Gazebo
Proper drainage protects your gazebo from water damage. The ground should slope away from the structure at about 2-3% grade (roughly 2-3 inches of drop per 100 linear feet) (fema.gov).
Create a shallow swale or depression around the perimeter of your gazebo area, sloping gently away from the structure. This directs water away from the foundation and prevents pooling. The swale doesn’t need to be deep, 2-4 inches is sufficient, but it must be continuous around all sides.
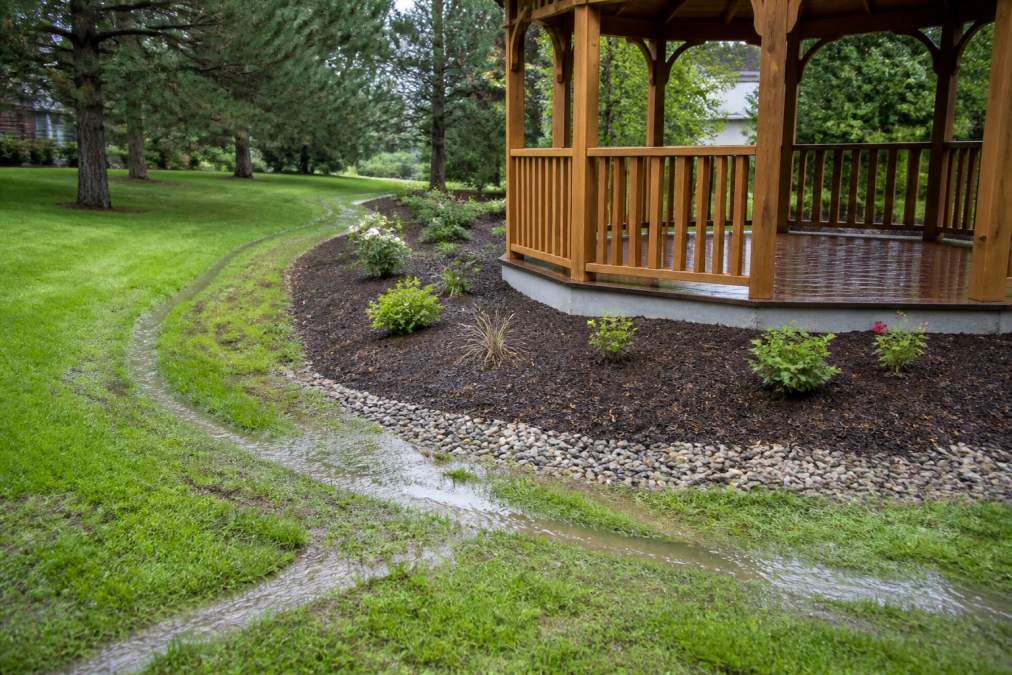
Compact the drainage swale firmly so water flows smoothly rather than soaking in near the structure. Add gravel or river rock to the swale if you want to improve aesthetics and drainage simultaneously. The rock prevents erosion and helps water move away quickly.
Test your drainage by running a hose on the graded area during a heavy rain simulation. Water should flow away from the gazebo, not pool around it. If you see standing water after 30 minutes, adjust the grade or add more swale depth.
For West Chester-area homeowners with clay soil, drainage is especially important. Clay holds water, so proper grading prevents soggy conditions that weaken soil and cause settling. Consider adding a layer of gravel under the gazebo itself to improve subsurface drainage.
Common Mistakes to Avoid When Leveling
Most homeowners make the same errors. Learning from them saves time and money.
Mistake 1: Trusting Your Eye, The human eye is terrible at detecting slope. What looks level often isn’t. Always use a level tool or laser. Don’t rely on appearance.
Mistake 2: Skipping Soil Compaction, Loose soil settles over time, causing your gazebo to shift. Compact in layers as you grade, not just at the end. This prevents future problems.
Mistake 3: Ignoring Drainage, Homeowners often level the ground but forget about water flow. Poor drainage leads to soggy soil, settling, and rot. Grade for drainage from the start.
Mistake 4: Over-Filling Low Spots, Adding too much soil at once creates soft, uncompacted areas. Work in 2-3 inch layers, compacting each layer before adding more.
Mistake 5: Not Removing Roots and Debris, Organic material decays, creating voids. Remove everything before grading. Don’t bury it under new soil.
Mistake 6: Inadequate Compaction, One pass with a tamper isn’t enough. Make multiple passes, overlapping each one. Soil should feel rock-solid underfoot.
Mistake 7: Rushing the Process, Proper grading takes time. Budget a full day for a typical 10×10 or 12×12 area. Rushing leads to mistakes that are expensive to fix.
When to Call a Professional for Yard Grading
Some situations call for professional help. Knowing when to hire saves frustration and prevents costly errors.
Call a professional if:
- Your yard has a slope greater than 10% (more than 10 inches of drop per 100 feet)
- The area is larger than 500 square feet
- You have significant clay, rock, or compacted soil that’s hard to work with
- Underground utilities run through the area and you’re unsure of their exact location
- You need drainage work beyond simple slope adjustment
- Local regulations require permits or engineer certification for site preparation
Professional grading contractors have equipment that makes large jobs fast and efficient. They can also advise on drainage solutions tailored to your specific soil and climate conditions.
In the West Chester region, many landscape contractors offer grading services at reasonable rates. Get multiple quotes and ask for references. A contractor familiar with local soil conditions and drainage challenges is worth the investment.
Riehl Structures works with homeowners who’ve already graded their sites, and we also connect customers with trusted contractors who can handle site prep as part of the installation process. Our team can assess your yard and recommend whether professional grading is necessary for your specific situation.
Proper site preparation is the difference between a gazebo that lasts decades and one that fails within years. Taking time to level your yard for gazebo installation protects your investment and ensures your outdoor structure performs reliably. Whether you handle the grading yourself or hire a professional, the effort is worth it. Once your foundation is solid, you can focus on enjoying your new outdoor space with confidence.
Ready to move forward with your gazebo project? Riehl Structures offers custom-designed gazebos and can guide you through site preparation. Get a quote now and let our team help you create the outdoor space you’ve been imagining.
===
Frequently Asked Questions
Do I need to level the ground before installing a gazebo?
Yes. An uneven foundation causes structural stress, water pooling, and premature wear on your gazebo. Most gazebos require a level surface within 1 inch of variation across the installation area. Even slight slopes can lead to gaps, warping, and difficulty closing doors or securing railings. Proper leveling ensures your gazebo remains stable and safe for years.
What is the best foundation for a gazebo on a sloped yard?
On sloped yards, concrete piers or adjustable post footings work best because they accommodate grade changes while keeping the structure level. Concrete pads are ideal for minor slopes (under 2 inches), while piers allow you to build up low corners individually. Gravel or sand bases alone won't prevent settling on slopes. The right foundation type depends on your slope severity and soil type, steeper yards benefit from professional assessment.
How do I know if my yard is level enough for a gazebo?
Use a 4-foot or 6-foot level and a measuring tape to check the installation area. Most gazebos tolerate up to 1 inch of variation across the entire footprint. Mark the highest and lowest points; if the difference exceeds 1 inch, grading is necessary. You can also use a laser level for larger areas or hire a professional to assess drainage and soil stability before installation.
What tools do I need to level my yard for a gazebo?
Essential tools include a 4-6 foot level, measuring tape, shovel, rake, and compactor (hand tamper or plate compactor for larger areas). A wheelbarrow, string line, and stakes help mark the area. For grading, you may need a mattock for hard soil. For larger yards or significant slopes, renting a walk-behind compactor or hiring equipment saves time and effort. A laser level is helpful but not required for smaller projects.
This article was written using GrandRanker

Copy Link