Can You Put a Shed on Grass? Foundation Guide
Copy Link
Table of Contents
- Why You Shouldn’t Put a Shed on Grass
- Shed Foundation Types: What Works Best
- How to Level Ground for a Shed: Step-by-Step
- Shed Anchoring Requirements and Site Drainage
- DIY vs. Professional Installation
- Building Codes and Permits for Shed Foundations
- Conclusion
Last Updated: August 7, 2026
Why You Shouldn’t Put a Shed on Grass
Placing a shed directly on grass creates serious structural problems. Grass is organic material that decomposes under weight, trapping moisture between the shed floor and soil. This causes uneven settling, warping, and deterioration far faster than it should. Wood components absorb continuous moisture, leading to rot, mold, and wood damage. Even pressure-treated lumber fails when in constant contact with damp soil.
Moisture damage and rot resistance
Moisture is the enemy of any outdoor structure. When a shed sits on grass, water pools underneath with nowhere to drain. Over months and years, wood rot develops in the floor joists and base frame. The problem worsens in humid climates or areas with heavy rainfall, where water splashes up around the shed’s perimeter and wicks into the structure, creating ideal conditions for fungal growth.
Riehl Structures builds sheds with quality craftsmanship designed to last decades, but even the finest structure will fail prematurely if it sits on grass without proper foundation preparation. The foundation is where durability starts.
Uneven settling and structural problems
Grass compacts unevenly depending on soil density and moisture levels. As shed weight presses down, these inconsistencies become pronounced, causing the structure to tilt or twist. Doors and windows become difficult to open, the roof develops stress points, and interior shelving shifts. Over time, structural integrity is compromised.
Soil composition matters too, clay, sand, and silt all compact differently. Grass roots hold some soil structure together, but once they die under the shed’s weight, that structure collapses and settling accelerates.
Shed Foundation Types: What Works Best
The right foundation choice depends on your budget, site conditions, climate, and durability goals. Each option offers different trade-offs in cost, durability, and installation difficulty.
Crushed stone and compacted gravel bases
A crushed stone or compacted gravel base is the most affordable option and works well for many homeowners. The process involves excavating the area, removing grass and vegetation, then laying down a layer of crushed stone. This material drains water away from the shed, preventing moisture pooling.
Crushed stone is angular and compacts well under weight. The key is proper compaction, loose gravel will shift over time. Landscape fabric laid underneath prevents grass and weeds from growing back up through the base. This foundation type works best in areas with moderate rainfall and good natural drainage. The gravel base typically lasts 5-10 years before needing refreshing.
Concrete pavers and blocks
Concrete pavers or blocks offer a middle ground between gravel and a full concrete slab. You excavate the site, prepare the ground, and set individual pavers at regular intervals. The shed’s base frame sits on top, distributing weight and keeping the structure elevated above ground level.
Pavers are easier to adjust than a full concrete slab, if the ground settles unevenly, you can add shims under individual pavers to re-level the structure. The main limitation is that pavers create gaps where water can flow underneath, so you need a proper moisture barrier under the shed’s floor. Pavers also require more maintenance than a solid concrete base and may need releveling over time.
Full concrete slabs
A full concrete slab is the most durable and stable foundation option. A concrete pad poured across the entire shed footprint creates a solid, level surface that won’t settle or shift. Concrete lasts decades and provides superior moisture protection.
The trade-off is cost and installation complexity. Pouring concrete requires site preparation, grading, proper drainage, and professional work in most cases. Concrete should slope slightly away from the shed to prevent water pooling. It’s the best choice for sheds in wet climates, areas with clay soil, or situations where you need maximum durability and minimal maintenance.
How to Level Ground for a Shed: Step-by-Step
Preparing the ground properly is the most important part of the installation process. A level, well-prepared site prevents settling, drainage problems, and structural issues down the line.
Step 1: Assess and mark your site
Choose your shed location and check for level ground using a long level or line level. Mark out the shed’s footprint with stakes and string, making the marked area slightly larger than the shed’s actual dimensions.
Check local building codes and zoning regulations. Many townships require permits for structures over a certain size and have setback requirements specifying how far from property lines a shed must be. Call your local building department before starting any work.
Step 2: Clear vegetation and excavate
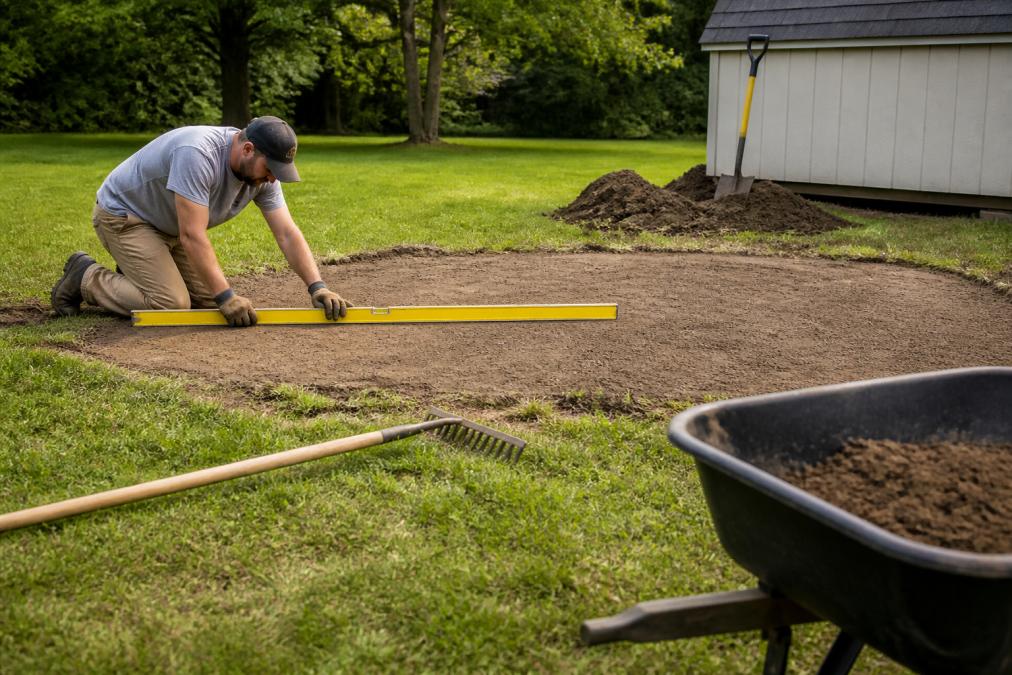
Remove all grass, weeds, and vegetation from the marked area using a shovel or sod cutter. This step is critical, leaving grass or roots underneath creates the exact problem you’re trying to avoid. Excavate to a depth of 4-6 inches depending on your foundation type, removing any large rocks or debris.
Step 3: Install moisture barrier and base layer
Lay down landscape fabric or a moisture barrier across the excavated area. This prevents grass and weeds from growing back up through your foundation and helps manage moisture.
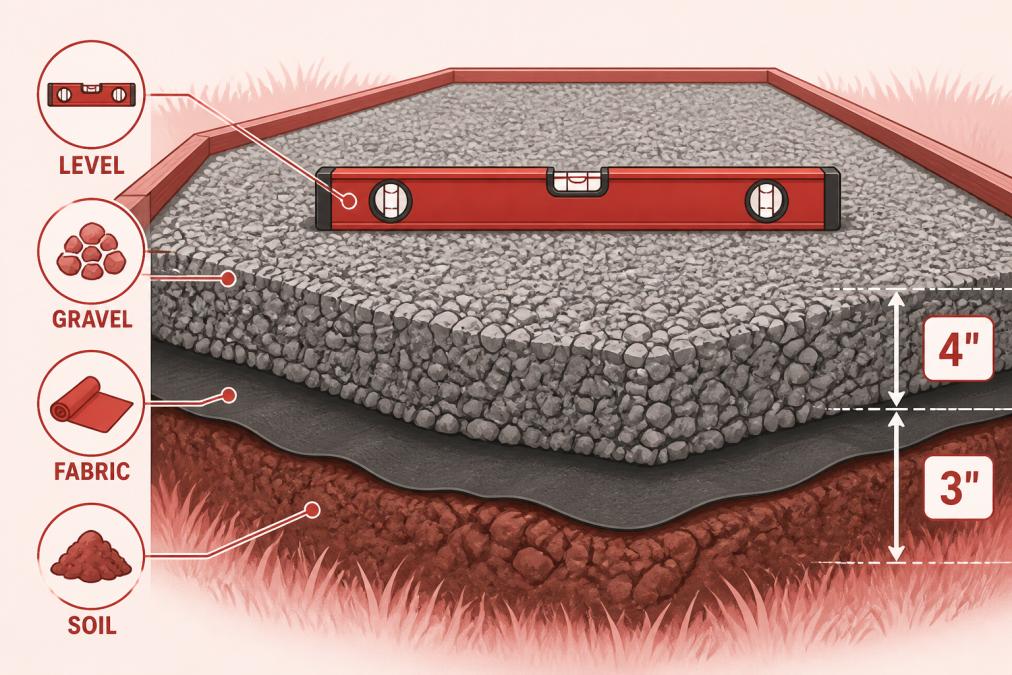
If using a gravel base, add 4-6 inches of crushed stone on top of the fabric. For pavers, prepare the base with sand or gravel, then set pavers in a grid pattern. For concrete, prepare the subgrade and set up forms for the pour.
Step 4: Compact and level the surface
Proper compaction is essential. Use a hand tamper or rent a plate compactor to compress the base material, making multiple passes from the edges toward the center. Check level frequently, the surface should be flat or slope very slightly away from where the shed will sit. Even small high spots or low spots cause problems over time.
Shed Anchoring Requirements and Site Drainage
Once your foundation is prepared, you need to anchor the shed and ensure water drains away from the structure.
Anchoring methods for wind resistance
A shed needs to be anchored to resist wind uplift and lateral movement. Building codes typically require anchoring for sheds over a certain size. Common methods include concrete footings, ground anchors, or metal straps bolted to the shed’s frame and anchored into the ground.
Concrete footings involve digging holes at each corner and setting concrete anchors below the frost line to prevent frost heave. Ground anchors are driven into the earth and connected to the shed frame with cables or straps. The method you choose depends on your foundation type and local wind exposure.
Proper drainage to prevent water pooling
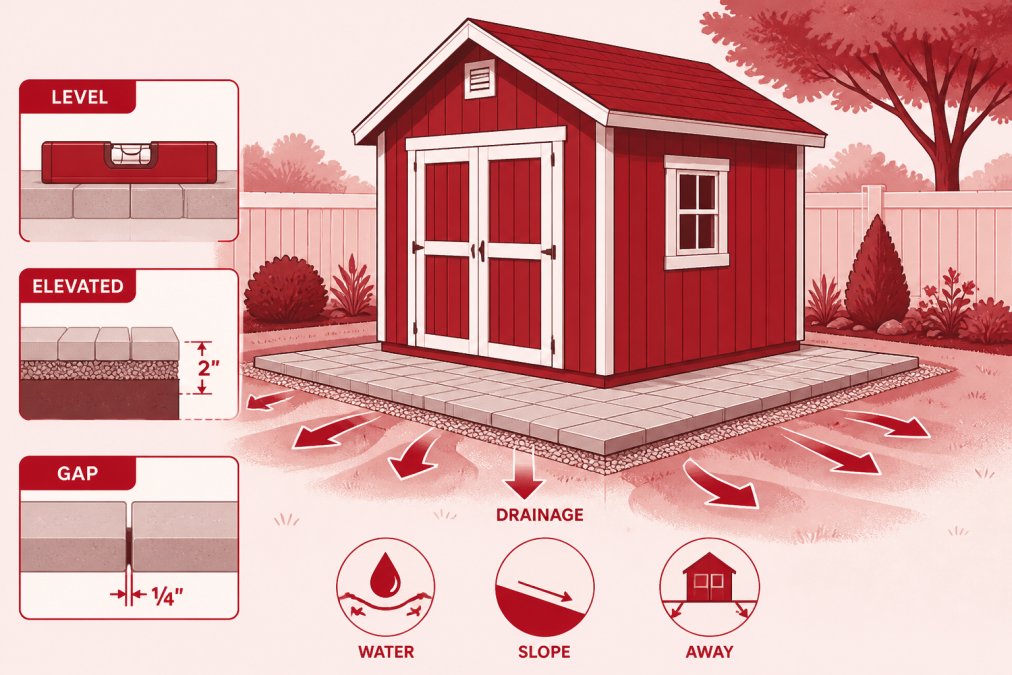
Water should flow away from the shed on all sides. Grade the ground around the shed so it slopes away, even a 2-3% slope makes a significant difference. If your site has poor natural drainage, consider installing a French drain or drainage swale on the uphill side of the shed.
For gravel bases, ensure the gravel extends at least 2-3 feet beyond the shed’s perimeter, sloping away from the structure. Route roof runoff away from the shed’s foundation through gutters and downspouts, not directly beside it.
DIY vs. Professional Installation
Installing a shed foundation yourself saves money but requires physical labor, proper tools, and attention to detail. Ground preparation alone takes a full day or more, and compacting a gravel base properly requires a plate compactor rental. Mistakes are easy to make and expensive to fix later.
Professional installation handles all variables. Builders know how to assess soil conditions, determine proper drainage, and install foundations that last. For homeowners in the Greater Philadelphia and Chester County areas, Riehl Structures provides complete installation services, including site preparation and foundation setup. This eliminates guesswork and ensures your shed starts on a solid foundation.
Building Codes and Permits for Shed Foundations
Building codes ensure structures are safe, properly anchored, and built to last. Requirements vary by township and county, but most jurisdictions have rules about shed size, setbacks from property lines, foundation type, and anchoring.
Before you start any work, contact your local building department or township office. Explain your project and ask about permit requirements, setback rules, and foundation specifications. Permits protect your property value and ensure the structure is safe. When you sell your home, buyers and their inspectors will check whether major structures have proper permits.
Placing a shed on grass without proper foundation preparation is a shortcut that creates long-term problems. Moisture damage, uneven settling, and structural failure are predictable consequences. The right foundation, whether gravel, pavers, or concrete, costs far less than repairing a failed shed.
If you’re planning a shed in the Greater Philadelphia or Chester County area, Riehl Structures can handle site assessment, foundation preparation, and professional installation. With 30+ years of experience building Amish-crafted structures, we know how to prepare sites that keep sheds level and protected for decades. Get a quote now to see how we can make your shed project stress-free from start to finish.
| Foundation Type | Best For | Durability | Cost |
|---|---|---|---|
| Crushed stone/gravel | Budget-conscious, good drainage sites | 5-10 years | Low |
| Concrete pavers | Adjustable, moderate climates | 10-15 years | Medium |
| Full concrete slab | Long-term durability, wet climates | 20+ years | High |
Frequently Asked Questions
What is the best base for a shed on grass?
A compacted gravel base with a moisture barrier underneath provides the most cost-effective solution for most homeowners. Crushed stone allows drainage while preventing direct ground contact and moisture damage. For areas with heavy rainfall or poor drainage, concrete pavers or a full concrete slab offer superior moisture protection and longer-term structural integrity. The best choice depends on your local climate, soil conditions, and how long you want the shed to last.
How do I prepare the ground for a shed?
Start by clearing vegetation and marking your foundation area. Excavate 4-6 inches of topsoil, then install landscape fabric to block weeds and moisture. Add 4-6 inches of compacted gravel as your base layer, ensuring the surface is level. Compact the gravel thoroughly with a plate compactor or hand tamper. Grade the surface slightly to direct water away from the shed. Proper ground prep prevents uneven settling, rot, and moisture damage over time.
What happens if you put a shed directly on the ground?
Direct ground contact causes multiple problems: moisture wicks into the floor and frame, leading to rot and structural failure within 5-10 years. The shed settles unevenly as soil compacts beneath it, creating gaps and stress on the frame. Grass grows underneath, trapping moisture and promoting decay. Weeds and insects have direct access to the structure. A proper foundation with moisture barrier and base layer prevents these issues and extends your shed's lifespan significantly.
How do I anchor a shed on grass to prevent wind damage?
Once your foundation is in place, use ground anchors, concrete footings, or lag bolts to secure the shed frame to the foundation. For gravel or paver bases, concrete footings sunk 2-3 feet into the ground provide the strongest hold. Anchor bolts spaced around the perimeter prevent the shed from shifting during high winds. Local building codes specify anchoring requirements based on wind load ratings in your area. Proper anchoring is essential in regions prone to severe weather.
This article was written using GrandRanker

Copy Link