Customize Amish Built Outdoor Pavilions: A Step-by-Step Guide
Copy Link
Table of Contents
- How to Customize Amish Built Outdoor Pavilions: Start Here
- Step 1: Assess Your Site and Plan Foundation Requirements
- Step 2: Choose Your Material and Roof Style for Custom Pavilions
- Amish Pavilion Design Ideas to Inspire Your Customization
- Step 3: Select Outdoor Pavilion Accessories and Add-Ons
- Amish Pavilion Kits Customization: Size, Dimensions, and Layout
- Step 4: Plan Installation, Delivery, and Long-Term Maintenance
- Common Mistakes to Avoid When Customizing Your Pavilion
Customize Amish Built Outdoor Pavilions: A Step-by-Step Guide
Last Updated: July 18, 2026
How to Customize Amish Built Outdoor Pavilions: Start Here
Customizing Amish-built outdoor pavilions transforms a basic structure into a personalized outdoor living space reflecting your specific needs and aesthetic preferences. The difference between a generic pavilion and a truly custom one comes down to intentional choices made early in planning. Start with your site, climate, and vision, then build outward from there.
Start your customization process by taking photos and measurements of your actual site, including ground slope, sun exposure, and proximity to trees. This single step prevents costly mistakes later.
Why Amish-Built Pavilions Offer Superior Customization
Amish craftsmanship brings flexibility that mass-produced structures cannot match. Because these pavilions are built by hand, modifications can be made at virtually any stage. A local builder can adjust dimensions, add reinforcement for specific wind conditions, or incorporate design elements that mass producers would refuse or charge premium prices for.
The real advantage is accountability. When a skilled craftsman builds your pavilion, their reputation depends on quality. This creates a natural incentive toward durability and attention to detail. Many pavilions built 20 or 30 years ago are still standing strong.
Customization also means you pay for exactly what you need, not for unwanted features. With Amish-built pavilions, you specify exactly what you want and pay for that alone.
Step 1: Assess Your Site and Plan Foundation Requirements
Understanding Site Preparation Needs
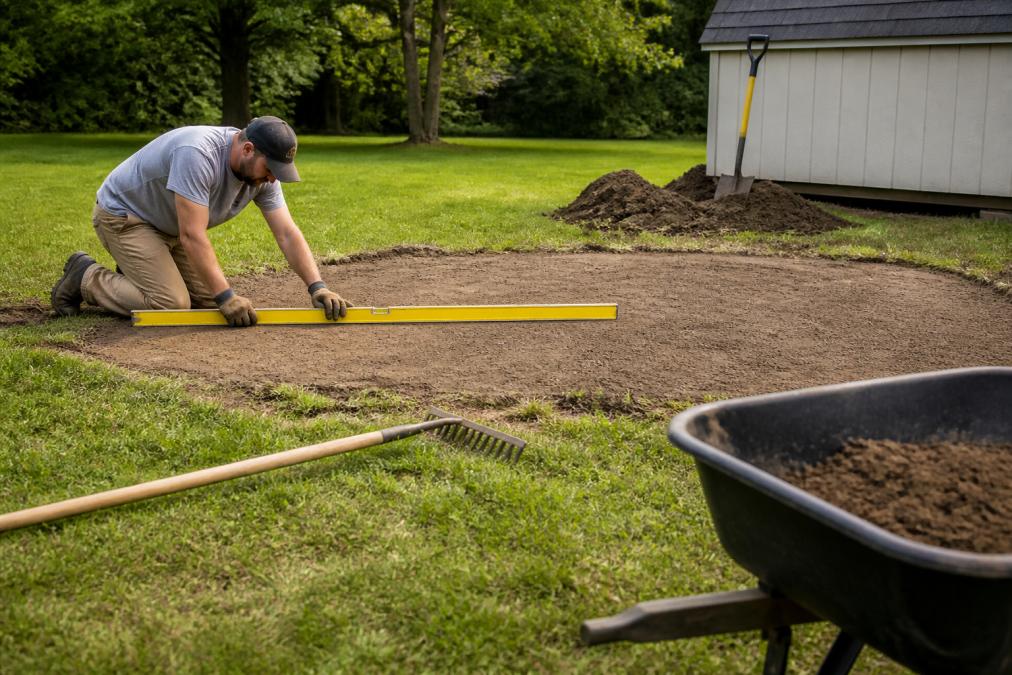
Your site preparation is more important than the pavilion itself. A structure built on an inadequate foundation will fail regardless of construction quality.
Start by evaluating ground conditions. Is your yard level or sloped? Slopes under 5% can often use a standard concrete pad. Beyond that, you’ll need grading work or a pier-and-beam foundation. Soil composition matters too, sandy soil requires deeper footings than compacted clay. Contact a local contractor or your county extension office if unsure.
Drainage is critical. Water pooling around your foundation leads to rot, frost heave, and structural failure. If your site has poor drainage, grade the area to shed water or install French drains.
Building on a slope without proper grading or foundation adjustment will cause your pavilion to shift and settle unevenly within [2-3 years](/how-to-maintain-wooden-pergolas/), leading to roof leaks and structural stress.
Permitting and Zoning Considerations
Most townships require permits for structures over 200 square feet. The permit process ensures your pavilion meets local building codes for wind load, snow load, and structural integrity.
Contact your township or county building department and ask: (1) Do I need a permit for a pavilion of [your size]? (2) What are the setback requirements from property lines? (3) Are there height restrictions or architectural guidelines?
Setbacks vary widely, some townships require 25 feet from property lines, others 50 feet or more. Architectural guidelines may apply in historic districts or planned communities, potentially restricting roof pitch, roofing materials, or color. Ask these questions early, not after design.
Most areas are reasonable about residential pavilions. Permitting usually takes 2-4 weeks and costs under $500.
Step 2: Choose Your Material and Roof Style for Custom Pavilions
Wooden vs. Vinyl Pavilions
The wooden versus vinyl choice is really about maintenance versus initial cost. Wooden pavilions offer warmth, natural beauty, and customizable finishes. They also require regular maintenance.
Pressure-treated wood is the standard for structural elements because it resists rot and insect damage. It’s affordable and proven but requires staining or sealing every 2-3 years.
Cedar offers superior appearance and requires less frequent maintenance than pressure-treated lumber. Cedar naturally resists rot and weathers beautifully to silver-gray if left unstained. Cedar pavilions typically cost 15-25% more than pressure-treated alternatives.
Vinyl pavilions eliminate maintenance, they don’t rot or require staining. The downside: they lack the warmth and character of wood and become brittle in extreme cold.
For most homeowners in temperate regions, wood is the better choice. The maintenance requirement is manageable, and the aesthetic payoff justifies it.
Wooden pavilions require maintenance but offer superior aesthetics and full customization potential. Plan for staining every 2-3 years and budget accordingly over the pavilion’s lifetime.
Roofing Styles and Shingle Options
Your roof is the most visible and functionally critical element. Traditional asphalt shingles are affordable, come in dozens of colors, and last 15-20 years. Metal roofing costs more upfront but lasts 40-60 years and requires virtually no maintenance. Metal also sheds snow better in winter climates.
Roof pitch affects both appearance and function. Steeper pitches shed water and snow more effectively and create more interior volume. Shallow pitches are more contemporary but require better guttering and drainage planning.
Gable roofs (peaked, triangle-shaped) are traditional and work well for most pavilion sizes. Hip roofs (sloped on all four sides) handle wind better and look elegant but cost more. Flat roofs are modern but require careful drainage planning.
Your roof color should complement your home’s roof and landscape. Metal roofs in bronze or dark gray look contemporary. Asphalt shingles in earth tones blend into natural settings. Lighter colors reflect heat and stay cooler in summer.
Amish Pavilion Design Ideas to Inspire Your Customization
Color and Stain Finishes for Visual Impact
Your stain color sets the mood and determines how your pavilion integrates with your landscape. Natural stains showcasing wood grain are timeless. Cedar left to weather naturally turns silver-gray over 2-3 years, creating a soft, aged appearance.
Darker stains in espresso, walnut, or charcoal create drama and sophistication. Dark stains hide dirt and weathering better than light stains, meaning they look maintained longer between refinishing cycles.
Semi-transparent stains let wood grain show through while adding color. Solid stains cover the grain entirely and last longer (3-4 years) than semi-transparent stains (2-3 years).
Your roof color should coordinate with your stain choice. A dark roof with light stain creates contrast and visual interest. A dark roof with dark stain creates a unified, sophisticated look.
Test your color choice before committing. Apply samples to your chosen wood, let them weather for a few weeks, and observe them in different light conditions.
Post and Column Designs for Architectural Details
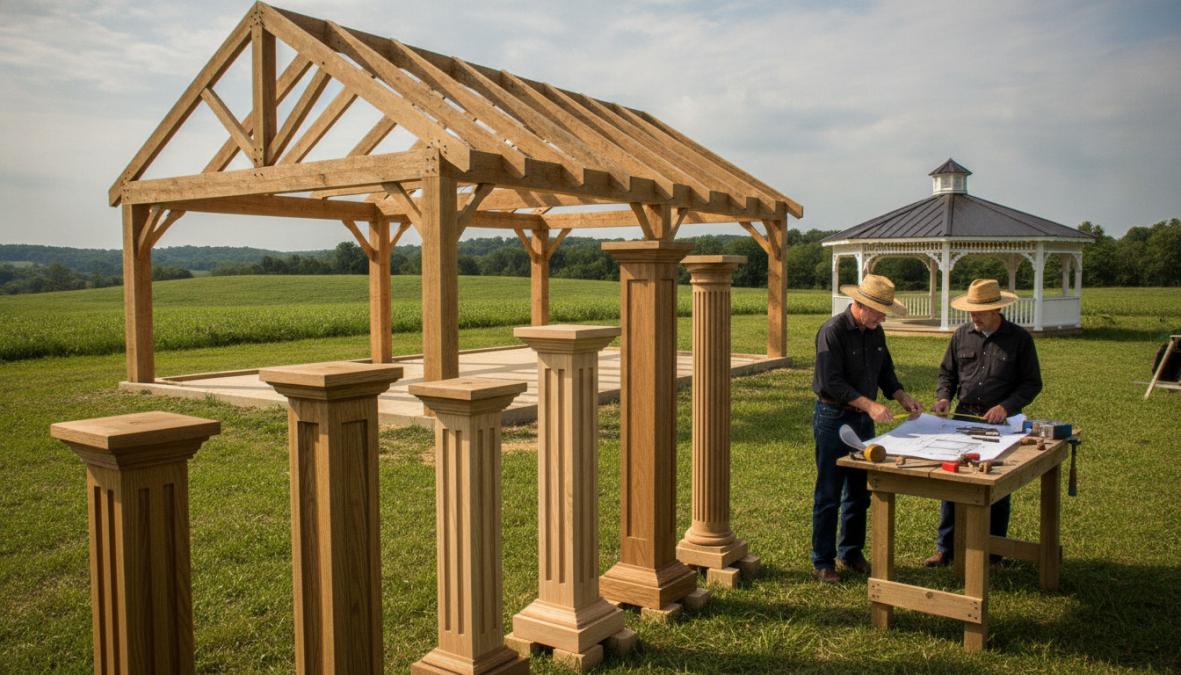
Posts and columns are both structural and aesthetic elements where you can add personality. Simple square posts in 4×4 or 6×6 lumber are functional and cost-effective. Decorative columns in 8×8 or larger add visual weight and presence.
Trim work around posts creates visual interest without major cost. A simple trim skirt at the base of each post or decorative brackets transforms a basic pavilion into something designed.
Post spacing affects how enclosed or open your pavilion feels. Posts spaced 8-10 feet apart create an open, airy feeling. Posts spaced 6 feet apart or less create more of an enclosed room feeling.
Step 3: Select Outdoor Pavilion Accessories and Add-Ons
Pavilion Electrical Package Options
Many homeowners want electrical service for lighting, fans, or charging devices. This requires planning during design, not after construction.
A basic electrical package includes a weatherproof outlet or two and overhead lighting, costing $800-1,500 installed. More comprehensive packages with multiple outlets, ceiling fans, and multiple light fixtures run $1,500-3,000.
Running electrical during construction is simpler and cheaper. If you might want electrical later, have the builder stub electrical to the pavilion location during construction. This costs $300-500 and saves thousands if you change your mind later.
Decorative and Functional Upgrades
Gutters and downspouts protect the area around your pavilion from water runoff and prevent mud splashing. Budget $400-800 for guttering a typical pavilion.
Ceiling fans improve air circulation and make the space more comfortable on warm days. A quality outdoor ceiling fan costs $150-400 installed.
Screens or partial walls create an insect-free zone without fully enclosing the space. Removable screen panels work well for seasonal use.
Storage benches, built-in seating, or shelving add functionality and make the space feel more intentional.
Amish Pavilion Kits Customization: Size, Dimensions, and Layout
Sizing Your Pavilion for Your Backyard Space
Pavilion sizing determines how the structure functions and relates to your home and landscape. A typical family gathering pavilion is 12×16 feet (192 square feet), comfortably accommodating a picnic table with room to move around.
Larger pavilions, 16×20 feet or 20×24 feet, work well if you entertain frequently or want separate zones for dining and lounging. Smaller pavilions, 10×12 feet, work for intimate spaces but feel cramped if accommodating a table and multiple people.
Match size to actual use. Think about how you’ll genuinely use the space, not how you imagine using it.
Site orientation matters too. Position your pavilion to take advantage of prevailing breezes in summer and minimize wind exposure in winter. Consider seasonal sun and shade patterns in your specific location.
Open Concept vs. Enclosed Designs
Open pavilions, just a roof and posts, are most affordable and feel most connected to the landscape. They work well in mild climates and for seasonal use.
Partially enclosed pavilions add walls on one or two sides, typically on the windward side or facing your home. This provides wind protection and privacy without full enclosure. Partial walls can be permanent or removable.
Fully enclosed pavilions with walls and doors function like small buildings. They’re significantly more expensive but extend the usable season and create a true outdoor room. Full enclosure typically adds 30-50% to the cost.
Consider your climate when deciding on enclosure. In mild regions with moderate wind, open pavilions work year-round. In areas with strong seasonal winds or significant cold, some enclosure adds real value.
Step 4: Plan Installation, Delivery, and Long-Term Maintenance
Installation and Delivery Process
From order to completion, expect 8-16 weeks for an Amish-built pavilion, depending on demand and customization complexity.
The builder will require a site visit to confirm foundation requirements and finalize measurements. Once construction begins, it typically takes 4-8 weeks. The builder constructs the entire structure in their workshop, then delivers it to your site.
On-site assembly takes 1-2 days for a typical pavilion. The delivery team positions the structure on your foundation, secures it properly, and makes final adjustments.
Your foundation must be ready before the pavilion arrives. If having concrete poured, do that at least one week before delivery to allow curing.
Schedule your foundation work 2-3 weeks before your expected delivery date. This gives you a buffer if weather delays the foundation work and prevents your pavilion sitting on-site waiting for an incomplete foundation.
Maintenance Schedules by Material Type
Pressure-treated wood pavilions require staining or sealing every 2-3 years. The first staining should happen within the first year after installation. Inspect annually and restain when the finish fades or water no longer beads on the surface.
Cedar pavilions require staining every 3-4 years if you want to maintain color, or no maintenance if you’re happy with natural silver-gray weathering.
Metal roofs require almost no maintenance beyond occasional inspection and debris removal. Asphalt shingle roofs should be inspected annually and cleaned of debris. Plan to replace asphalt shingles every 15-20 years.
Gutters and downspouts need cleaning twice yearly, in spring after trees bud and in fall after leaves drop.
Wood posts and structural elements should be inspected annually for signs of rot, insect damage, or weathering.
| Material | Maintenance Task | Frequency | Typical Cost |
|---|---|---|---|
| Pressure-treated wood | Stain/seal | Every 2-3 years | $500-1,000 |
| Cedar wood | Stain (optional) | Every 3-4 years | $400-800 |
| Metal roof | Inspection & debris removal | Annually | $0-200 |
| Asphalt shingles | Inspection & cleaning | Annually | $0-300 |
| Gutters | Cleaning | Twice yearly | $0-400 |
| Posts & structure | Visual inspection | Annually | $0 |
Common Mistakes to Avoid When Customizing Your Pavilion
The most common mistake is underestimating the importance of site preparation. Homeowners rush to get their pavilion built and skip proper grading or drainage work, leading to water pooling, frost heave, and structural failure within years. Do the site work right, even if it adds time and cost upfront.
Another frequent error is choosing materials based solely on initial cost without considering maintenance. Over 20 years, additional staining costs for a pressure-treated pavilion can exceed the initial savings versus cedar. Think in terms of total cost of ownership.
Oversizing or undersizing is common. Spend time really thinking about how you’ll use the space and what size serves that purpose.
Skipping the permit process creates legal and practical problems. An unpermitted pavilion might not meet local wind or snow load codes, creating safety risk.
Poor electrical planning is another common regret. Think through electrical needs during design, not after construction.
Finally, many people underestimate maintenance requirements. If you’re not genuinely committed to maintenance, choose lower-maintenance materials like vinyl or metal roofing.
Customizing your Amish-built outdoor pavilion is one of the most rewarding home improvement projects you can undertake. The key is making intentional choices early about site preparation, materials, sizing, and maintenance. Riehl Structures specializes in helping homeowners navigate these decisions with custom-designed pavilions built to last decades. With flexible financing options, free delivery within 30 miles, and a family-owned commitment to quality craftsmanship, they eliminate stress from the customization process.
Frequently Asked Questions
What customization options are available for Amish-built outdoor pavilions?
Amish pavilion customization includes material selection (wood or vinyl), roof style and shingle colors, post and column designs, stain or paint finishes, size and dimensions, electrical packages, and decorative upgrades. You can also customize the layout for open-concept or semi-enclosed designs. Each option is tailored to your specific backyard needs and aesthetic preferences.
Do I need site preparation or permits before installing a custom pavilion?
Yes, site preparation is essential. Your yard may need leveling or foundation work depending on slope and soil conditions. Most areas require permits for outdoor structures, check with your local township before purchasing. Uneven terrain doesn't prevent installation; professional site prep can accommodate slopes. Permitting requirements vary by location, so verify zoning regulations early in your planning process.
What's the difference between wooden and vinyl Amish pavilion kits customization?
Wooden pavilions (cedar or pressure-treated lumber) offer traditional aesthetics and excellent customization with stain colors, but require regular maintenance. Vinyl pavilions are maintenance-free and weather-resistant but offer fewer color options. Wooden structures provide superior craftsmanship details and architectural character, while vinyl prioritizes durability and low upkeep. Your choice depends on your maintenance preference and desired visual impact.
How long do Amish-built pavilions last, and what maintenance is required?
Properly maintained Amish-built structures typically last 20-30+ years due to superior craftsmanship and quality materials. Wooden pavilions need annual staining or sealing and regular inspection for weathering. Vinyl pavilions require minimal maintenance, occasional cleaning and hardware checks. Pressure-treated lumber resists rot naturally, while cedar requires more attention. Regular maintenance schedules extend structural integrity and protect your investment in outdoor living spaces.
This article was written using GrandRanker

Copy Link